Arduino Nano (Classic, ATmega328P)
⚡ The essentials in 60 seconds
- mcu — Microchip (ex-Atmel) ATmega328P, 8-bit AVR @ 16 MHz (IC max 20 MHz @ 5 V).
- memory — 32 KB flash (bootloader occupies 1.5 KB per Wikipedia), 2 KB SRAM, 1 KB EEPROM.
- gpu_storage — none.
- i_o — 22 digital I/O pins total (14 on the digital header, 6 with PWM; the analog header pins double as D14–D21), 8 analog inputs (10-bit ADC), 1× UART, 1× SPI, 1× I²C.
- usb — Mini-USB Type-B (official board) via FTDI FT232RL USB-to-UART (Wikipedia); ICSP 6-pin header on top edge.
- power — USB or VIN 7–12 V; no power jack — breadboard-oriented (docs page); 5 V logic; 3.3 V pin available at 50 mA.
- On this board : 9 tutorials · 10 code
The Arduino Nano, specifically the classic model built around the ATmega328P microcontroller, stands as a foundational pillar in the world of electronics prototyping. Initially released in 2008, this board was designed with a singular, powerful philosophy: to bring the full capabilities of the larger Arduino Uno into a form factor small enough to fit directly onto a breadboard. A breadboard is a solderless board with rows of holes that allows hobbyists and engineers to connect electronic components using jumper wires without needing to solder them permanently. By adopting a compact 45 by 18 millimeter footprint and weighing only seven grams, the Nano eliminated the need for extra wiring and space, making it an instant favorite for wearable technology, compact robots, and dense circuit projects. While the earliest units utilized the ATmega168 chip, the version most commonly referenced today features the ATmega328P, a robust 8-bit AVR microcontroller running at a clock speed of 16 MHz. This frequency determines how many instructions the processor can execute per second, providing ample speed for most sensor reading, motor control, and logic tasks. The chip includes 32 KB of flash memory for storing your program, 2 KB of SRAM for temporary data processing, and 1 KB of EEPROM for saving settings that must persist even when the power is turned off.
Despite its diminutive size, the Nano does not compromise on connectivity, offering a comprehensive set of input and output options. It provides 22 digital I/O pins in total, which are the physical points where the board interacts with the outside world. Of these, 14 are located on the main digital header, and six of them support Pulse Width Modulation, a technique that simulates analog signals by rapidly switching a digital pin on and off, allowing for precise control of things like LED brightness or motor speed. Additionally, there are eight analog input pins, which can read continuous voltage levels from sensors, such as light detectors or temperature probes. The board also includes one set of hardware communication interfaces for each of the major serial protocols: UART for general serial communication, SPI for high-speed data transfer, and I2C for connecting multiple devices on just two wires. A notable advantage over the larger Uno is the exposure of two extra analog channels, A6 and A7, which are available because the Nano uses a different chip package that breaks out these additional pins.
Powering the Nano requires a slightly different approach than its larger siblings. It does not feature a barrel jack for a standard power adapter. Instead, it draws power either through its Mini-USB Type-B connector or via the VIN pin, which accepts a voltage range of 7 to 12 volts. This narrow voltage window is stricter than the Uno’s wider range, so users must be careful with their power sources. The board operates at 5-volt logic levels, meaning its signals are high at 5 volts and low at 0 volts. While there is a 3.3-volt pin available on the header, it is important to note that it can only supply up to 50 milliamps of current. This limitation is critical when connecting power-hungry peripherals like Wi-Fi modules, which may require more current than the Nano can safely provide, potentially causing the board to reset or malfunction. Each individual digital pin can source or sink up to 40 milliamps, which is sufficient for driving small LEDs or relays but not for high-power devices.
Communication with a computer is handled through a Mini-USB port, which on genuine Arduino boards is connected to an FTDI FT232RL chip. This chip converts the USB signals from your computer into the serial signals the microcontroller understands. The FTDI chip is renowned for its stability and driver support across Windows, macOS, and Linux. However, a significant aspect of the Nano ecosystem involves third-party clones. Many affordable versions of the Nano use a different USB-to-UART chip, typically the CH340 or CH341. While these clones function similarly, they require different drivers to be installed on your computer. This distinction is crucial for beginners, as installing the wrong driver can lead to connection errors. Furthermore, the Mini-USB connector itself is mechanically fragile and can wear out after repeated insertions, a common complaint that has led many users to prefer boards with more durable USB-C or micro-USB connectors in later revisions.
Programming the Nano is done using the Arduino Integrated Development Environment (IDE) or other compatible tools like PlatformIO. The board uses a bootloader, a small program pre-installed in memory that allows you to upload new code over USB without needing special hardware. The upload process is automated through a feature called software auto-reset. When your computer opens the serial port to send code, a signal on the DTR line triggers a capacitor to briefly reset the microcontroller, putting it into bootloader mode. While convenient, this mechanism can sometimes cause issues. If data is sent immediately after the connection opens, the bootloader might intercept the first few bytes, leading to dropped characters or configuration errors. This is a known quirk of the classic Nano design that experienced users learn to work around by adding small delays in their communication scripts.
The Nano’s legacy extends beyond its own specifications. It established a de facto standard for pin layout that subsequent models, such as the Nano Every and the Nano R4, have followed. This means that many projects designed for the classic Nano can be upgraded to newer, more powerful boards with minimal changes to the wiring. The board is also highly versatile in software, supporting the standard Arduino core, real-time operating systems like FreeRTOS, and protocols like Firmata, which allows the board to be controlled from a computer using languages like Python or JavaScript. Whether you are blinking an LED, reading a GPS module, or driving an LCD screen, the Arduino Nano offers a proven, compact, and capable platform. Its combination of full Uno-like functionality, breadboard-friendly size, and extensive community support makes it an enduring choice for both learning electronics and building finished products.
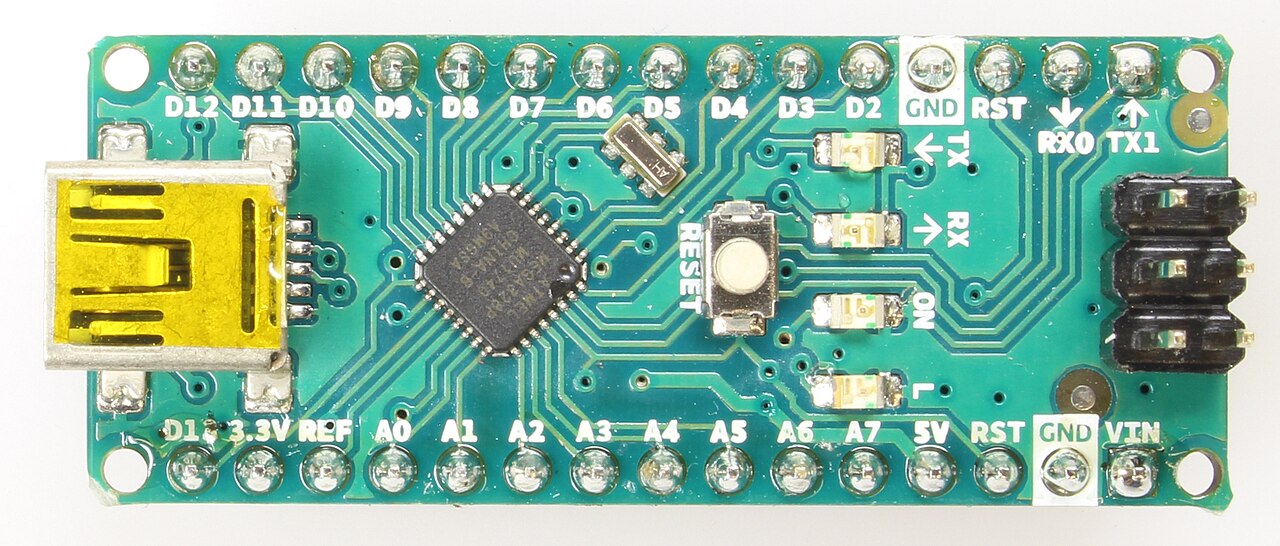
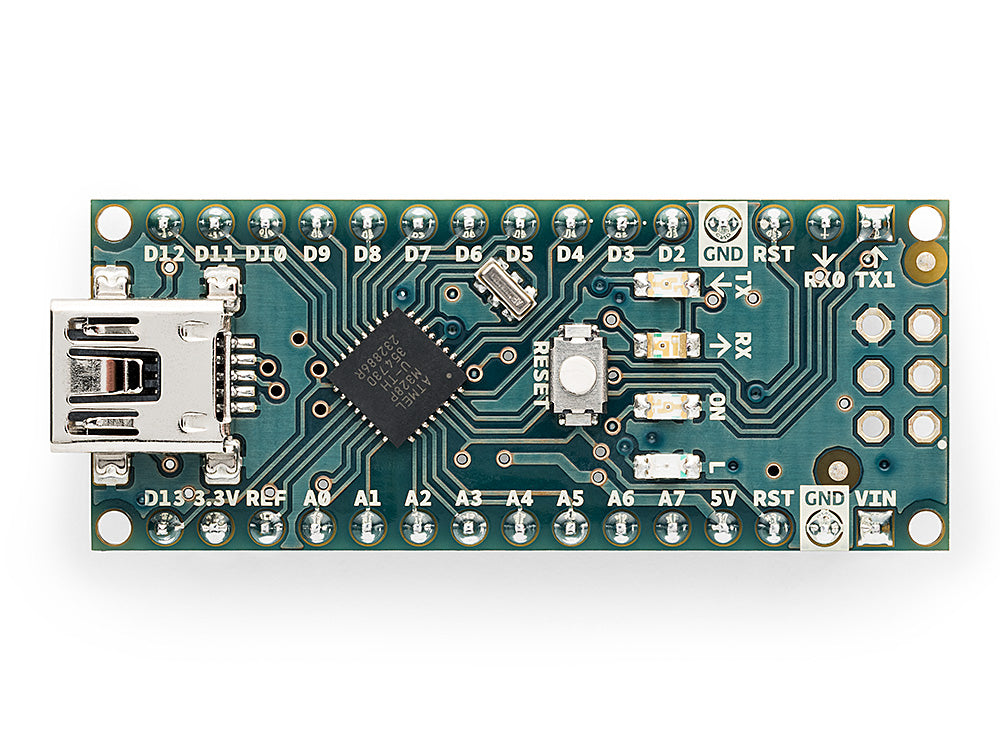
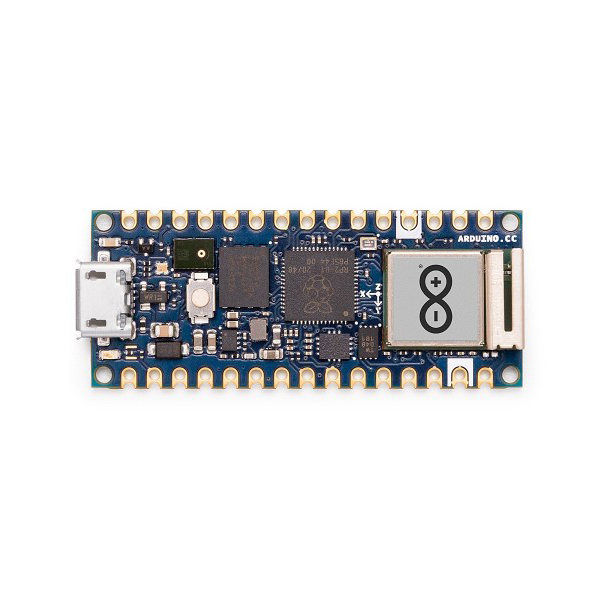
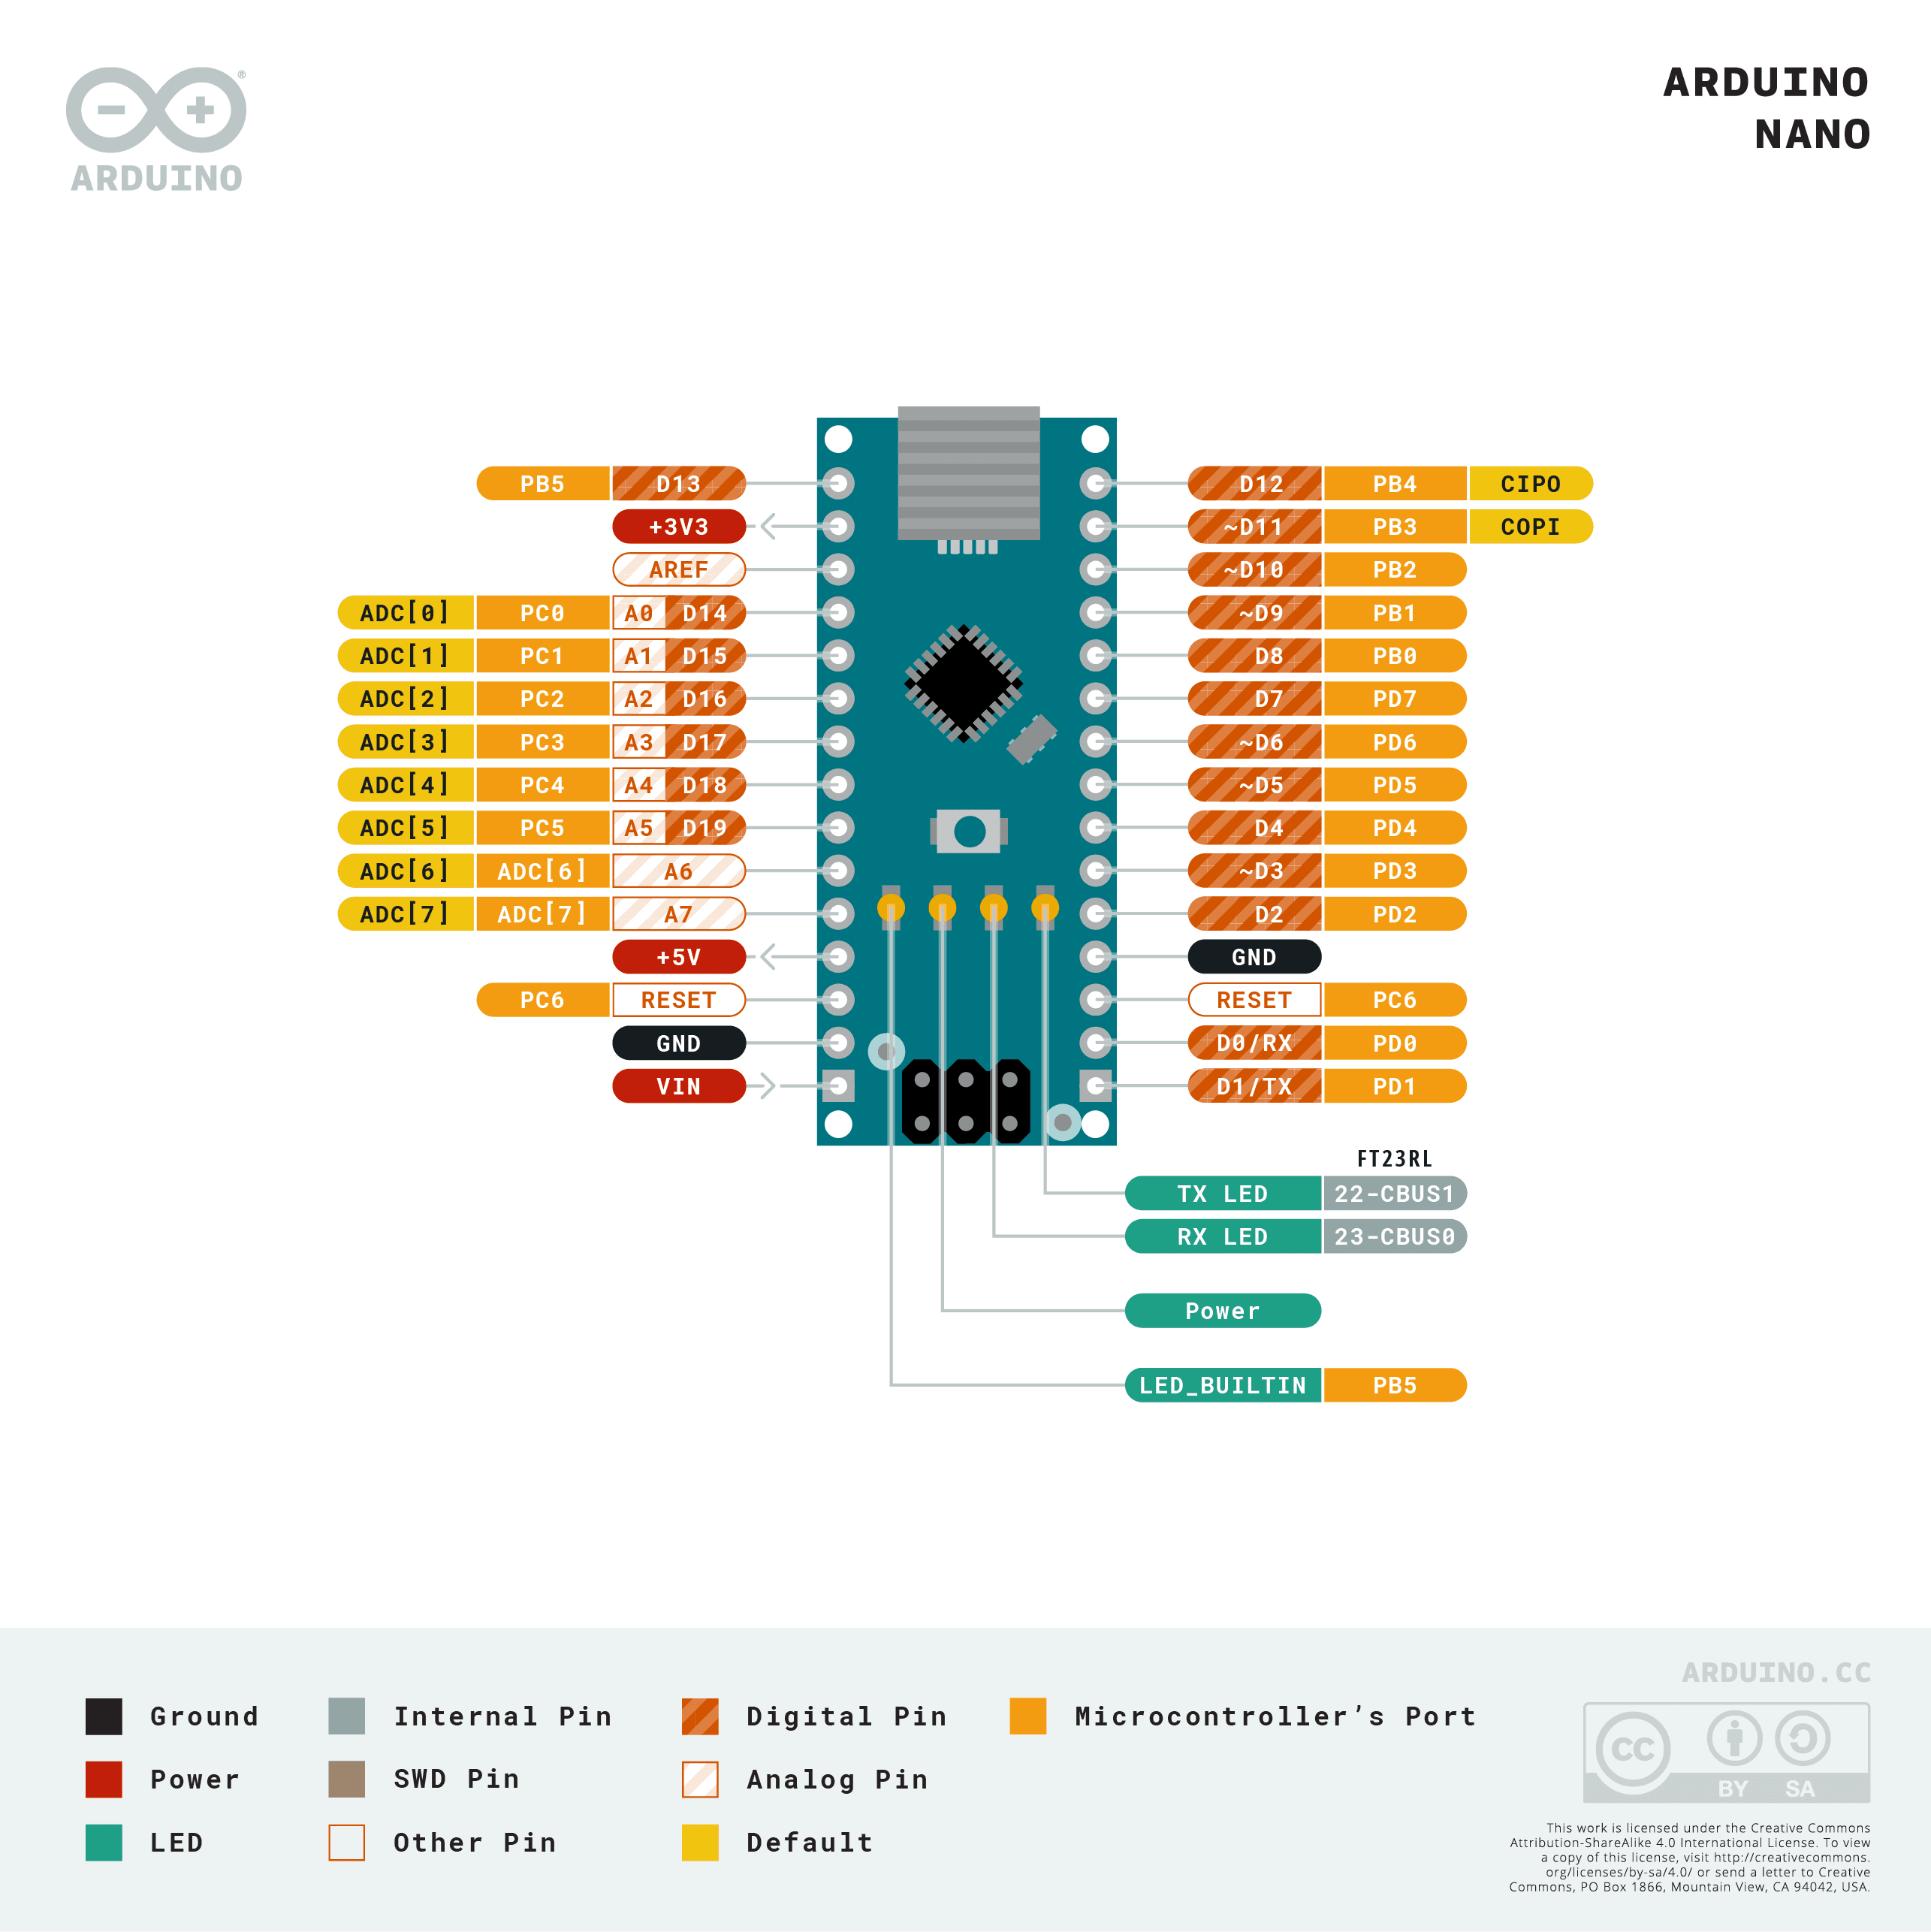
Pinout diagram
| Attr | Specs | verified |
|---|---|---|
mcu | Microchip (ex-Atmel) ATmega328P, 8-bit AVR @ 16 MHz (IC max 20 MHz @ 5 V). | ? unverified |
memory | 32 KB flash (bootloader occupies 1.5 KB per Wikipedia), 2 KB SRAM, 1 KB EEPROM. | ? unverified |
gpu_storage | none. | ? unverified |
i_o | 22 digital I/O pins total (14 on the digital header, 6 with PWM; the analog header pins double as D14–D21), 8 analog inputs (10-bit ADC), 1× UART, 1× SPI, 1× I²C. | ? unverified |
usb | Mini-USB Type-B (official board) via FTDI FT232RL USB-to-UART (Wikipedia); ICSP 6-pin header on top edge. | ✔ |
power | USB or VIN 7–12 V; no power jack — breadboard-oriented (docs page); 5 V logic; 3.3 V pin available at 50 mA. | ✔ |
per_pin_dc_current | 40 ma | ✔ |
size_weight | 45 × 18 mm, 7 g (Wikipedia; docs page confirms "45 mm × 18 mm… 7 grams"). | ✔ |
- Manufacturer: Arduino (arduino.cc / Arduino AG); board ID "Arduino Nano".
- Year: 2008 — "The Arduino Nano is an open-source breadboard-friendly microcontroller board… developed by Arduino.cc and initially released in 2008" (Wikipedia — Arduino Nano). Early units used the ATmega168 before the 328P revision (Wikipedia — Arduino).
- Status: Active — still sold and documented as "the classic Nano… the oldest member of the Arduino Nano family" (docs.arduino.cc/hardware/nano, store page).
- Price:
- Variants: ATmega168 originals → ATmega328P ("Nano 3.0" era, official part sold today); official successors Nano Every (2018/2019, docs), Nano 33 IoT / Nano 33 BLE Sense (docs page), Nano R4 (2025, Wikipedia); plus a massive clone ecosystem (CH340 USB chips, micro-USB or USB-C sockets, etc. — Wikipedia comparison note).
+ Strengths
- Breadboard-first form factor: DIP-30-style 2×15 header, 45×18 mm — "Arduino's smallest board" for years, "similar to the Arduino Duemilanove but made for the use of a breadboard" (docs page).
- Full Uno capability in 1/4 the area: same ATmega328P, plus 2 extra analog channels (A6/A7) exposed because the 32-pin TQFP's spare ADC pins are broken out (Wikipedia).
- FTDI FT232RL: hardware CDC serial, rock-solid on all OSes on genuine boards (Wikipedia).
- Solderable directly to a carrier PCB (headers optional at purchase), which made it a fixture of finished maker products.
- De-facto pin standard later reused by the Nano Every and Nano R4 (Wikipedia).
− Weaknesses
- DTR auto-reset eats the first bytes: reset is coupled to FTDI DTR through a 100 nF cap; every time a host opens the port the board resets and "the bootloader… will intercept the first few bytes of data sent to the board after a connection is opened" — classic cause of dropped boot config strings (Wikipedia — Automatic (software) reset).
- Clone driver roulette: third-party Nanos "often have a different… USB-to-UART chip" (Wikipedia comparison note) — typically CH340/CH341, requiring separate drivers and occasionally hitting counterfeit-FTDI driver blocks (ftdichip.com/drivers, wch-ic.com).
- Mini-USB socket wear: the official connector is Mini-B, mechanically fragile after repeated insertions; clones substitute micro/USB-C with varying wiring quality (Wikipedia).
- No power jack: power must come from USB or VIN/5V pins — no barrel option like the Uno (docs page).
- 3.3 V pin is weak (50 mA) — ESP8266/ESP32 peripherals on that rail brown-out under TX bursts (Wikipedia).
- VIN range is narrow (7–12 V) vs the Uno's 6–20 V absolute range (Wikipedia).
- Retour d'expérience expert expert — expert-arduino
- Je reviens sur la Nano classique pour clarifier certains points souvent mal compris. C'est vrai que le facteur de forme est imbattable pour le prototypage sur breadboard, avec ses 45x18 mm qui permettent de tout caser sans encombrer le circuit. La capacité complète de l'Uno est là, avec en bonus le… — expert-arduino
- Exactement, et si tu ajoutes les clones à l'équation, ça devient un casse-tête. J'ai reçu une carte vendue comme officielle qui utilisait un chip CH340 au lieu du FTDI, ce qui m'a obligé à chercher des drivers spécifiques sur le site de WCH-IC. Le pire, c'est que le connecteur Mini-USB a lâché au b… — hacker_minimaliste
- Merci pour ces précisions sur le 3.3V, je ne savais pas que le courant était si limité et mon module Wi-Fi redemarrait en boucle. Pour le problème de port série, je soupçonne aussi le driver générique Windows de bloquer la communication avec les cartes clones. Je n'ai pas de jack d'alimentation, do… — maker_debutant
Community feedback and projects
- Can you buy nano-clones on aliexpress? forum.arduino.cc
- Knock Off Nanos forum.arduino.cc
- Why is the "L" LED keep blinking on my Arduino Nano? forum.arduino.cc
- My Arduino Nano Atmel Mega 328p is fried! forum.arduino.cc
- I cant upload my code to arduino nano (old bootloader) forum.arduino.cc
Content not available yet.
- DTR auto-reset eats the first bytes: reset is coupled to FTDI DTR through a 100 nF cap; every time a host opens the port the board resets and "the bootloader… will intercept the first few bytes of data sent to the board after a connection is opened" — classic cause of dropped boot config strings (Wikipedia — Automatic (software) reset).
- Clone driver roulette: third-party Nanos "often have a different… USB-to-UART chip" (Wikipedia comparison note) — typically CH340/CH341, requiring separate drivers and occasionally hitting counterfeit-FTDI driver blocks (ftdichip.com/drivers, wch-ic.com).
- Mini-USB socket wear: the official connector is Mini-B, mechanically fragile after repeated insertions; clones substitute micro/USB-C with varying wiring quality (Wikipedia).
- No power jack: power must come from USB or VIN/5V pins — no barrel option like the Uno (docs page).
- 3.3 V pin is weak (50 mA) — ESP8266/ESP32 peripherals on that rail brown-out under TX bursts (Wikipedia).
- VIN range is narrow (7–12 V) vs the Uno's 6–20 V absolute range (Wikipedia).
- Clignotement de la LED builtin (broche 13) debutant Schéma : IMG-nano-classic-debutant-1-nanoc-blink-led.svg — Arduino Nano classique avec sa LED builtin sur la broche 13 et une LED externe optionnelle avec résistance 220 Ω
- Bouton avec pull-up interne debutant Schéma : IMG-nano-classic-debutant-2-nanoc-bouton-pullup.svg — bouton poussoir câblé entre la broche 2 et la masse, pull-up interne activé, LED builtin témoin
- Lire un capteur analogique (potentiomètre) debutant Schéma : IMG-nano-classic-debutant-3-nanoc-capteur-analogique.svg — potentiomètre 10 kΩ en diviseur de tension sur A0, Arduino Nano classique, affichage série de la valeur 0-1023
- Variateur d'intensité LED avec PWM intermediaire Schéma : IMG-nano-classic-intermediaire-4-nanoc-pwm-led.svg — LED avec résistance sur broche PWM 9 de l'Arduino Nano, potentiomètre sur A0 pilotant analogWrite
- Piloter un micro-servo moteur intermediaire Schéma : IMG-nano-classic-intermediaire-5-nanoc-servo.svg — micro-servo SG90 alimenté en 5 V, signal sur broche 9 de l'Arduino Nano, balayage 0-180 degrés
- Console série et piège DTR du FTDI intermediaire Schéma : IMG-nano-classic-intermediaire-6-nanoc-console-serie-ftdi.svg — Arduino Nano relié en USB au PC, flux série 9600, chronologie de la réinitialisation automatique par DTR qui avale les premiers octets
- Registres AVR et interruption timer avance Schéma : IMG-nano-classic-avance-7-nanoc-registres-timer.svg — Arduino Nano, LED sur broche 13, timer1 du ATmega328P en mode CTC déclenché par interruption, chronogramme OCR1A
- Arduino as ISP : programmer un autre ATmega328P avance Schéma : IMG-nano-classic-avance-8-nanoc-arduino-as-isp.svg — Arduino Nano maître en Arduino as ISP relié par le connecteur ICSP 6 broches à un ATmega328P nu esclave sur breadboard avec quartz 16 MHz
- Low-power : mode power-down et watchdog avance Schéma : IMG-nano-classic-avance-9-nanoc-low-power-watchdog.svg — Arduino Nano sur batterie avec LED de faible consommation, réveil périodique par watchdog en mode power-down du ATmega328P
Code library — examples written for this board
buzzer-melodie.inoArduinoservo-sweep.inoArduinoultrason-hcsr04.inoArduinolcd-i2c.inoArduinoeeprom-contre.inoArduinosommeil-watchdog.inoArduinocompteur-impulsions.inoArduinopotentiomete-plot.inoArduinonano_plot.pyPythonscanner-i2c.inoArduino
Examples and repos found online
- arduino/ArduinoCore-avr github.com
- arduino-libraries/Servo github.com
- arduino-libraries/LiquidCrystal github.com